Category Archives: WebSite Information

Throughput testing of ESP8266 module, size matters !

Summary

I’m looking into the ESP8266 module as a possible low cost alternative to the high speed spi module I use but, looking around I didn’t see any clear specs that told me how much data I can push through the thing. So I decided to run some tests and see how much data I could push through. I’m using a python application to simply send random data through the unit, I vary the baud and transmit package size and try and find sweet spots where there is maximum throughput.

Please if you know of any way to make them faster let me know. Maybe there is another firmware or way of interfacing that could make it faster.

Results

Comparing it to my other wifi modules it is very slow, my other wifi modules do up to 4.5Mbps (bits) where the esp maxes out at about 7KBps or .056Mbps (in tcp mode) which is very slow. Even with compressed jpeg images we are looking at 2fps at very low resolution.

In UDP mode we maxed out at about 19.2KBps which is much better, but it also has all the hurdles of UDP traffic that comes with the gain in speed. Thats about .15Mbps. At this speed it is possible that I could get a frame rate of 19KBps/3BJpg = 6fps 🙁 I easily get 2Mbps using my other wifi device, in fact my other wifi device is not even at its full potential because the camera can only output at 20fps.

Anyway these are my results, if you want to maximize throughput they may be helpful to you. I also realize that some of these tests may have to do with my network and butterfly wings but the overall trend line should be useful !

ESP Info

ESP03, on a custom made board
AT+GMR
00200.9.5(b1)
compiled @ Dec 25 2014 21:40:28
AI-THINKER Dec 25 2014

230400 Baud, TCP Client

Max Bps = 5760 @ TX Packet Size 1400

230400

460800Baud, TCP Client

Max Bps = 7200 @ TX Packet Size 1424

4608000

460800Baud, UDP Client

Max Bps = 19200 @ TX Packet Size 1904

4608000UDP


Bi Weekly Update 12 Red tracks, Cots parts

Done:

Finished picking pinouts so cots parts work with discovery
Tested Camera, Motor Control, Boost and Wifi
Cut out sides to hold Red tracks
Constructed and added Red Tracks

Summary:

A little late adding this update. I had some issues getting the camera working correctly, as well as the wifi. But everything is working great now. Picking the right pins and such. Added a bunch more logging output. Drove around quite a bit. The red tracks are a little bumpy because of the outside teeth, but it does not shake the video feed too much.

This version is going on the shelf as “done”. It has on/off switch and battery charger so its a working model that I can pull down and use whenever I want to demo the functionality. It has two batteries 18650, so it should last for hours before needing to recharge. I really didnt like the way the wifi is, I think its too fragile, but everything else is really rock solid.

The 3d printed sprockets are so-so, as well as the wooden sides. They do their job but I think there is a much better way of doing all of that. I want to make the inner side plate of the tracks simply extend from the regular side plate. This removes an entire part and a bunch of nuts and bolts. The outer track plate is not really required, we could simply have a U bolt sort of arrangement so the axels for the sprocket and bearings are looped back into the inner side plate. This way it will not be so wide, and there will be less parts and pieces. But this may be bad because you can catch your fingers in the track, or the track can come off.

Goals for next Bi-Weekly:

  • top circuit gets through layout
  • android application works well
  • user settings saved in bot flash
  • ordered new pcbs (connection, comm inventek, comm esp8266)
  • layout esp8622 board so we can have alternative wifi

Thanks for reading !

Bi Weekly Update Number 7

We have a really solid design for the enclosure now. Ordered most of the parts and will be assembling in a few weeks. The enclosure is cost efficient, strong and expandable. Aluminum extrusions are the same enclosures used for industrial devices, they are made to attach or have things attached too.

The client is made in unity, so it will work on most all of the devices out there out of the box without having to make a different client for every platform.

I will try and get some good renders of the enclosure, as well as get the simulator working on my machine so people can test it out.

Bi Weekly Update number 7

New these last two weeks

BrainBoard

  1. High speed wifi
  2. Access point or connecting to router

BodyBoard

  1. Charger
  2. Boost circuit
  3. Motor Circuit
  4. Integration with Brainboard

Enclosure / Shell

Printed a test shell to ensure the bot will not be ridiculously slow, fast or eat up batteries etc. Didn’t get a chance to drive it yet, but all the components fit in the enclosure fine.


Testing the zBot on the “Cloud”

Diagram1

Setup a test where my zEngineExample service ran on a free trial of openhosting.com linux VM. Unfortunately I used 5gb of network traffic in 2 days and expired my trial before I had a chance to do a lot of investigating.

To begin with the web client is the slowest most troublesome of the clients, on top of that the cloud server was somewhere on the east coast. There was so much latency between the web client and the cloud server that the messages timed out and were thrown away from the zEngine service. From what I could tell there was something like 300ms of latency to connect and do anything, this is unacceptable for real time applications

I had the zEngine service connecting even if there were no active clients, so this caused all kinds of traffic when no one was even using it.

Will have to retest and next time:

  • Make service disconnect when no clients
  • Test latency between me and cloud server
  • Use lowest resolution
  • Test native clients

Back to BlueTooth ! (Edit: or not)

Just an update the bluetooth seemed like a good idea at the time with the options available, but I made a lot of breakthroughs with wifi and finalized the bot to use wifi. I now get over 1Mbps and can get up to 4mbps, there is no need to in most cases though since I max out the camera at 20fps. I will be releasing another article soon.

—- Old Article

As I have moved along with wifi I started to have an enormous desire to allow the wifi to send all of the information into a browser instead of a custom application I write. This way the user simply starts up their browser and points it at the wifi bot and they get a video stream and a robot they can manipulate. From there the same controls and commands you can send with the ZEngine java API you could send over the url to your bot. This will allow developers to use pure javascript or other languages to interface with the bot. But this model does not allow any bluetooth, so I thought to myself what do I do with all of this bluetooth code I have written and this nice system I already have ? It must be useful to someone ? So I decided to split the bot into three, one for bluetooth, one for wifi and one for long range. You can read about it here

http://zonerobotics.com/wordpress/?page_id=314

Long story short I want to finish the hardware and the software by September. So my goal is to get all the bluetooth stuff that I already had working and make it work again and finalize it. The hardware will have support for all three bots but the first version and the software will use the bluetooth modules. This way I can finalize the body and the hardware and have a fun toy and then start long term development on the other bots.

I had big issues with the bluetooth before being inconsistent with the firmware. I would write drivers for one module then order some more and they didnt work the same. A really smart guy from France named Byron has documented how to burn a good or at least consistent version of software onto the HC-05 modules. I have made contact with Byron and he has graciously agreed to help me with the project should I have issues. http://byron76.blogspot.com/

So, for now its full steam ahead finalizing a bluetooth bot, for better or worse !

ZEngine and PC client is here, Android client is almost done

Hello All ! I know it has been a while since my last update. I am actually working and making very good progress. As always the facebook page is the most up to date and the BEST way to contact me !

In a nutshell I’m almost done with Bot 2 of 4. It works well and I’ve added several new features. Whats left to do for Bot 2 is clear and Bot 3 will be even better.

ZEngine

I have built a “engine” that does all of the heavy lifting for communicating with the system. Connecting, sending and receiving message and even other stuff like system statistics are all take care of by the engine. The engine is fully documented and has been stripped down as much as possible to keep it simple and easy to use.

The engine can be used in a Linux or Windows java application, or in android. The same exact engine is integrated into all of the software that is developed on to of it, no matter what the platform.

Servos

I have added support for up to 4 servos. Each servo is independantly controlled by sending it an angle of up to a tenth of a degree. The angles are from 0 to 180. This works well with the micro servos and has me thinking of ways to control the camera as well as how to add arms or appendages.

Analog to Digital Conversions

I had previously only 1 ADC that worked on the hardware. I had thought eventually I would get to three. However after investingating it again I was easily able to get 6 to work. So now the unit has 6 ADC conversions updated about 10 times a second. One of them is used for the battery, this helps you know when the battery is getting low. I also plan on using another one for the charging current, but this will be in bot3.

Battery Situation

I was amazed that all of this works on one single CR123 battery at 3.7v. As of now it lasts about 30 minutes before the software will notify you that the battery is low. As with most electronics when the battery is low it misbehaves more. I dont know if I will continue to try and use only one cell. I built a extra battery pack in case I need it, this would give me about 3 hours of battery life.

IMG_20140411_221313

I have also investigated the battery charger and understand how it works. I even made a test circuit. BUT working with the IC is nearly impossible, it is too small. I burnt up the one I was testing with and moved on. Theoretically it looks like everything is good and it *should* work. Hopefully I can also address this in bot3 if I have any charger IC’s left. I have not been able to find a larger IC replacement that works the same.

Wifi

I’m using wifi communication, which for some reason maxes out at about the same as the bluetooth 230Kbps. It is however much more stable and powerful since you can connect it to your router and forward it across the internet. You would have issues pushing bluetooth across the internet.

I still support the bluetooth modules, and even another wifi module. I dont know how much support I will have for the other modules. I think support for them will be on a “as needed” basis. However, as of now there is working drivers for all the modules I have used.

In bot3 I plan on switching to SPI which will give me a much greater throughput, up to 4Mbps with the same wifi interface. I will also have to add commands to connect to your router and set passwords etc.

Commands

There is a small set of commands that can be sent to the bot, In both the java example and the android example I expose the entire tree of commands. I have also added several commands to do things such as set the camera resolution, set gpio, slow superloop and much more. I’ve wrapped all of the commands into a system so you can simply call the function with the name of the command as a string and send it off.

For example to send a message to slow the internal loop of the bot down by having a delay of 500 milliseconds you can send this command (assuming you are connected).

                    BotMessage bm = new BotMessage();
                    // slow things down if debugging !
                    bm.updateMessage("CONTROL", "SETDELAY", 500);
                    bm.sendMessage();

That is all the code needed to create and send the message. It is the same for all of the other commands that control pwm, servos, camera etc.
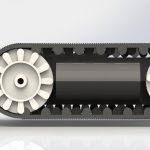
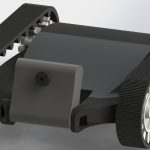
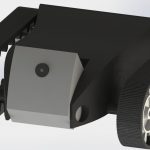
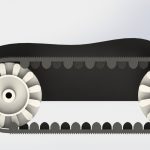
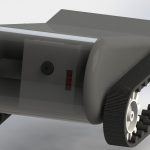
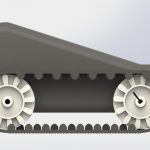
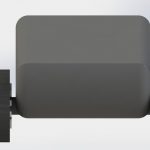
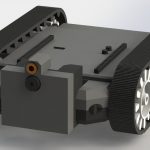
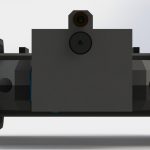
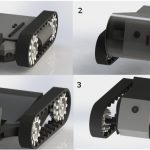
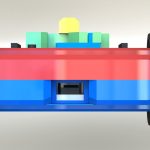
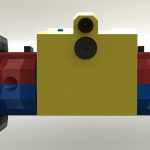
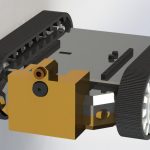
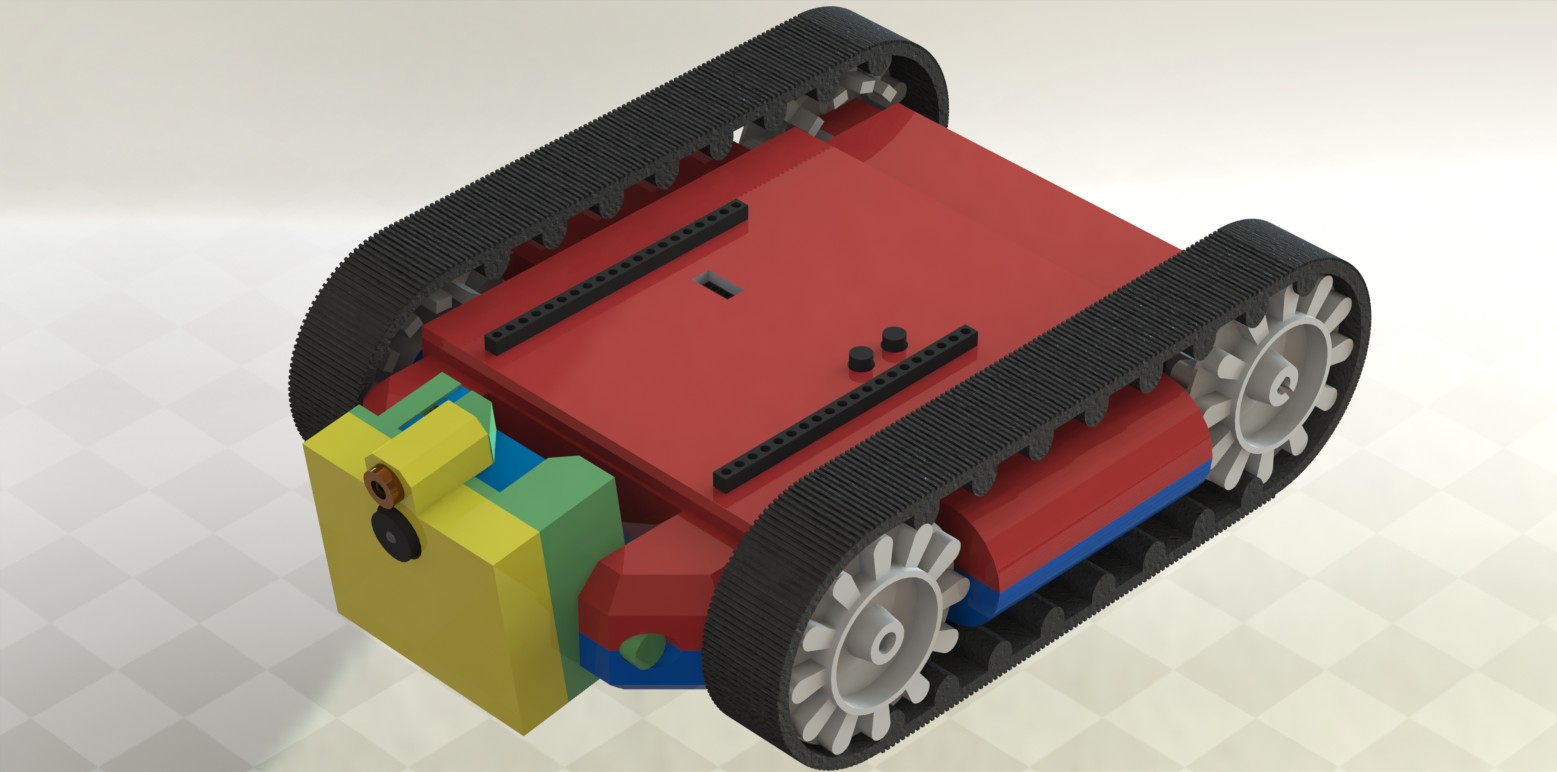
Platform

I have built this platform similar to Bot1, but I used the polulu 30T tracks this time so I can compare and contrast the two. I also attached lights to the front.

Java PC Example

I have written a java application that shows how to use the ZEngine. This application exposes all of the controls to the user. It is meant to be a starting point for whoever wants to develop a specific application on top of the ZEngine. zenginepcexample


I have a short and semi confusing video using it on Youtube. It shows all of the components functioning together.
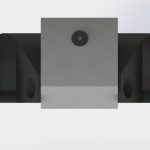
Android Example

I do not consider it complete until the Android software works as well. I’m almost done with the Android example code. It also exposes all of the functionality to the user. The picture you see below has all of the controls in a “sliding drawer”, so when you hit the control button at the top all of the controls are out of your sight.

It shows you the status of all gpio and the ADC’s, and when you bring up all the controls it gives you control of 8 gpio, 4 servos and the custom command tree (which is everything).

To “drive” I have implemented left and right motion controlled by two pointers on either side of the screen. So if you put your thumb down anywhere on the left side of the screen and move upward the left motor will move forward, same for backward and the right motor. I’m not sure how easy it will be to drive this way, but if its not fun I’ll put in the simple analog joystick control again.

screenshot-1400381240146